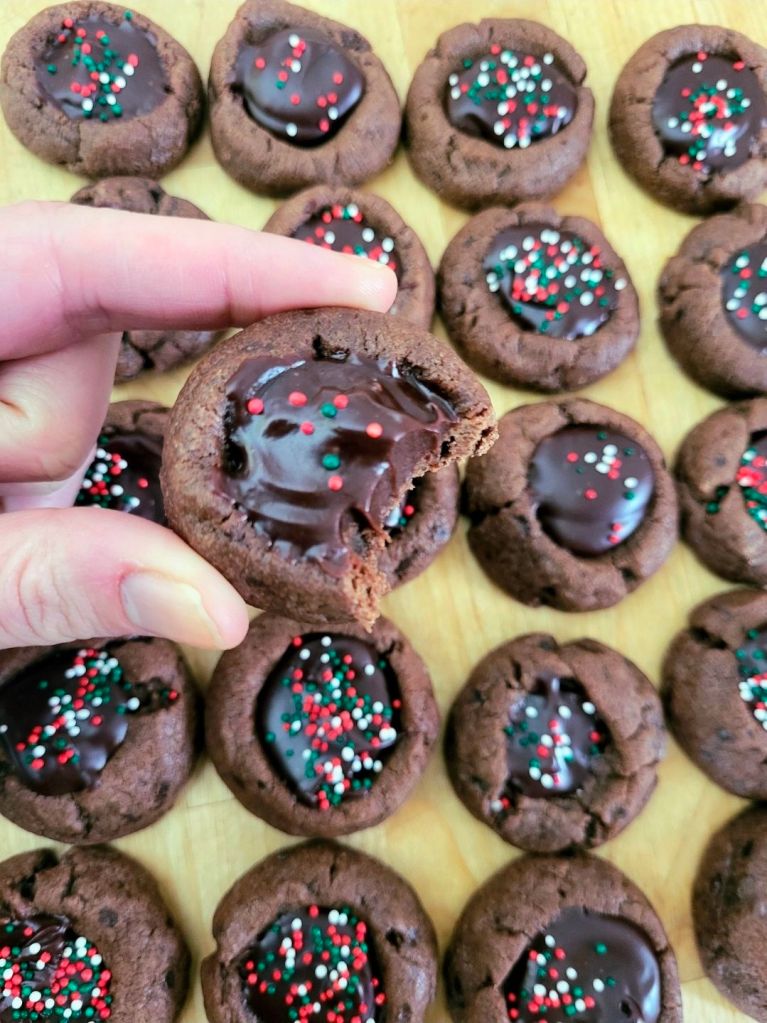
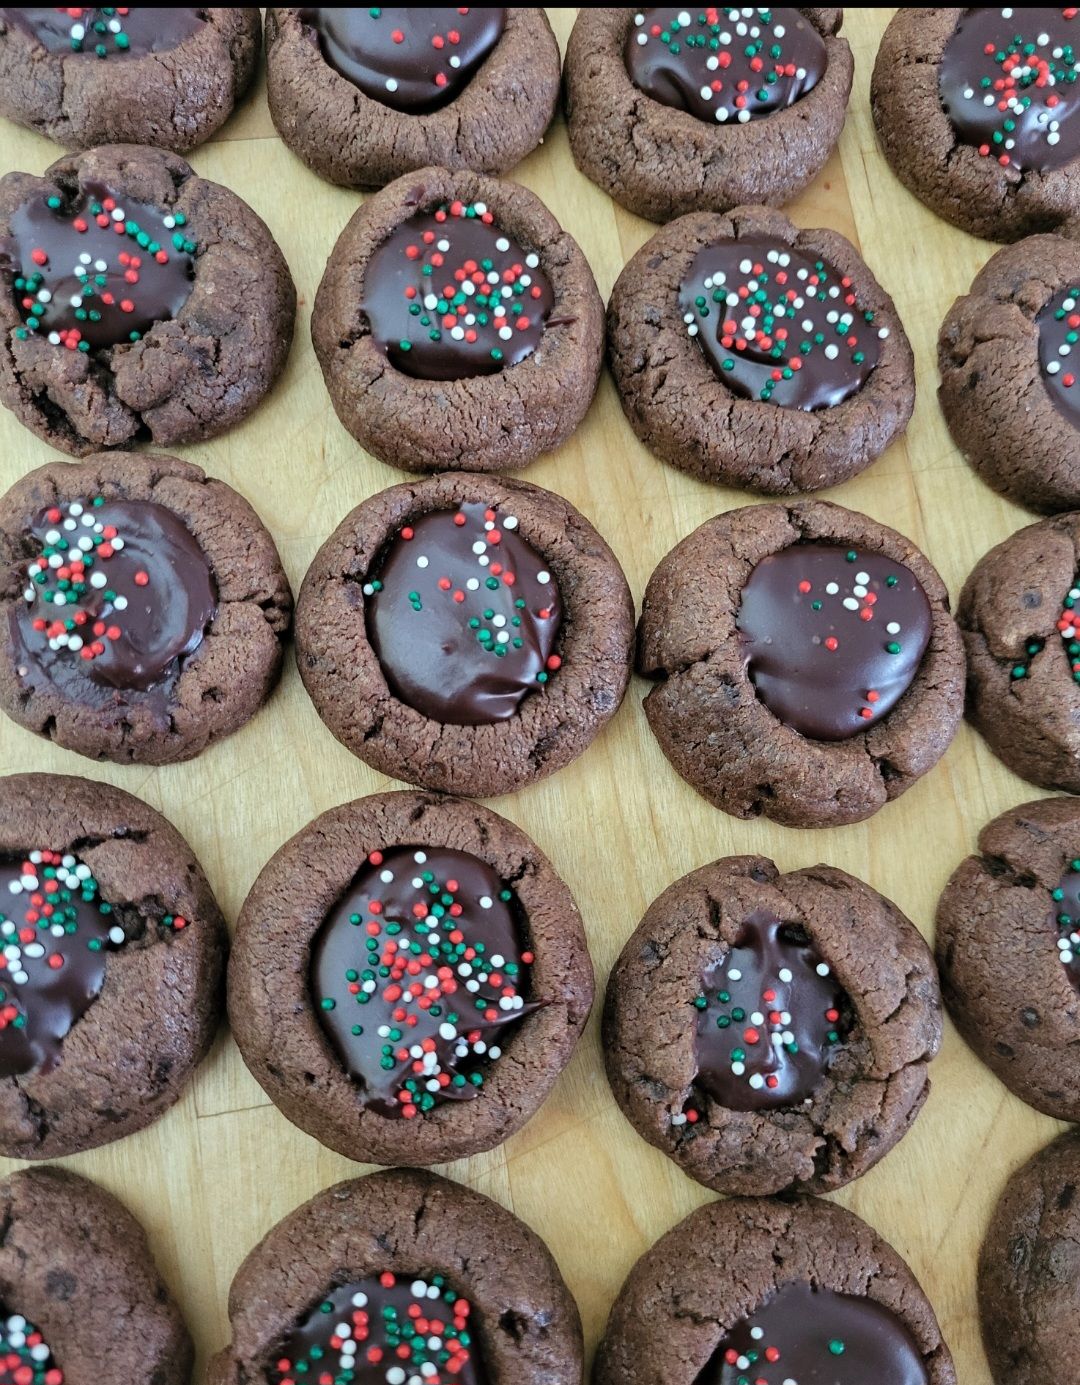
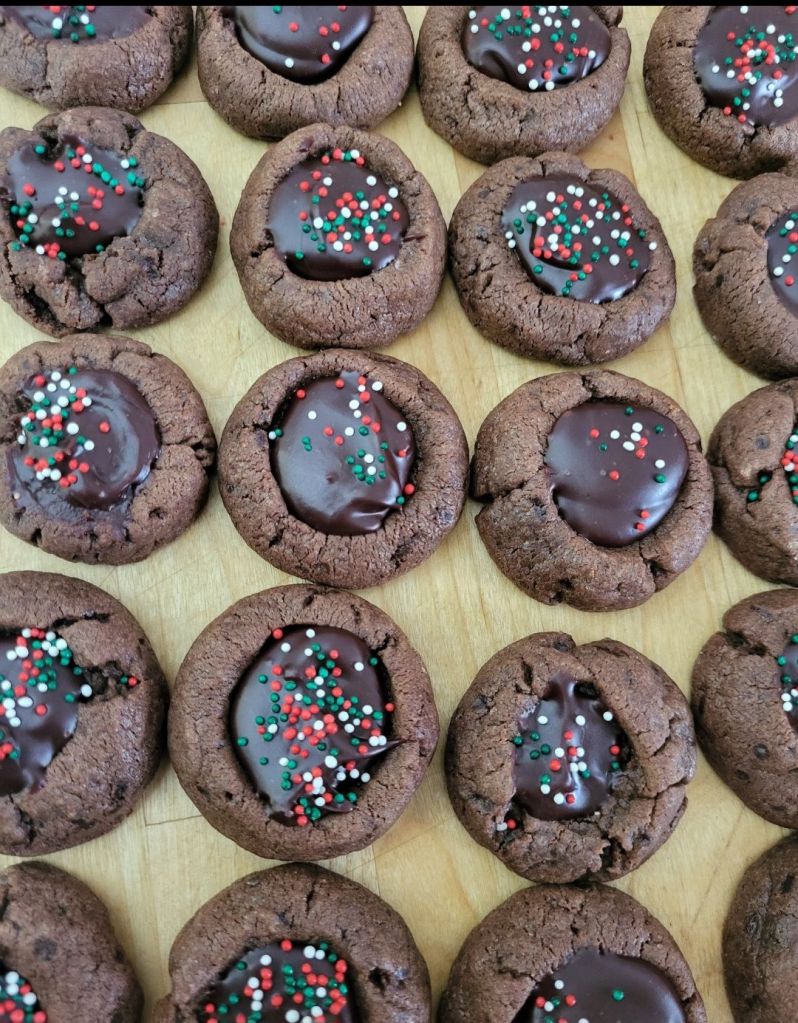
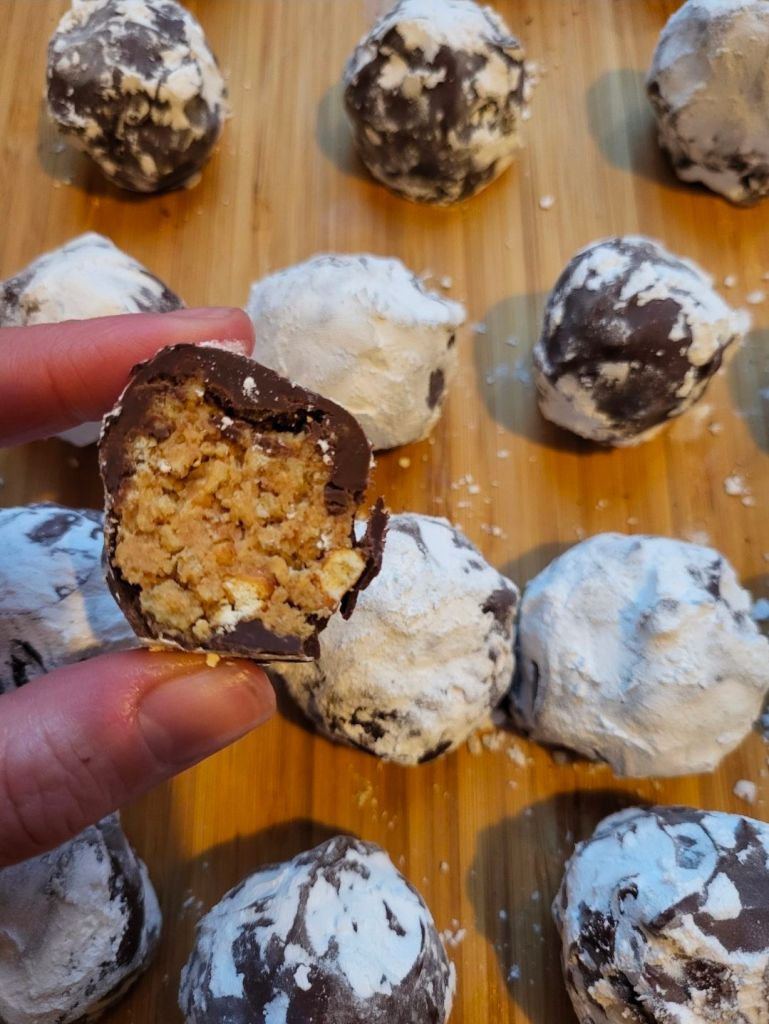
Chocolate Thumbprint Cookies with Chocolate Ganache

I can’t believe we’re already very much in the holiday season! Christmas is 10 days away, and Hannukah started this weekend. One of the reasons it’s my favorite time of year is really because of all the cookies and baking. If cinnamony-sugary cookies (Taylor Swift Chai cookies) aren’t your thing and you’re more of a chocolate person, here’s a fun recipe you can try on your own or bake with kids!

These chocolate thumbprint cookies have become such a staple in our Christmas cookie rotation over the last few years. Even though I started making them after my grandma died, I always think of her while baking them because she was a self-proclaimed chocoholic and I know she would have loved these. I make them in her honor and it makes me happy that my dad and GM get to enjoy them too since they both love chocolate just as much.

Chocolate Thumbprint Cookies (With Chocolate Ganache)

Here’s what you need

For the cookies

  • 3 cups (about 360 g) all-purpose flour
  • 1 cup (80 g) Dutch process cocoa powder
  • 1/2 teaspoon salt
  • 1 teaspoon baking powder
  • 1 ½ cups unsalted butter, softened
  • 1 ½ cups (330 g) packed light brown sugar
  • 1/2 cup (100 g) granulated sugar
  • 4 egg yolks, at room temperature
  • 1 Tablespoon vanilla extract

For the ganache

  • 1 cup (200 g) semisweet chocolate chips
  • 1/2 cup heavy cream
  • Festive sprinkles for topping

Here’s what you do

  1. In a medium bowl, whisk together the flour, cocoa powder, salt, and baking powder.
  2. In a large bowl, cream the butter, brown sugar and granulated sugar for about 2 minutes. Add the egg yolks and vanilla and mix until fluffy, about 1 to 2 minutes.
  3. Add the dry ingredients and mix just until combined.
  4. Scoop about 1 Tablespoon of dough at a time and roll into a ball.
  5. Use a small measuring spoon (or your/your child’s finger) to press an indent into each ball.
  6. Chill the indented dough for at least 1 hour or in the freezer. I like to make these in early December and freeze until they’re just ready to bake before Christmas.
  7. When ready to bake, preheat the oven to 350 degrees.
  8. Arrange the chilled dough balls about 1 ½ inches apart on cookie sheets lined with parchment paper or Silpat mats. Bake for 10 minutes.
  9. When they come out of the oven, gently press the centers again with the small spoon if the indent rose during baking. Let the cookies cool on the baking sheet for 6 minutes, then transfer to a cooling rack to cool completely.
  10. While cookies are cooling, add chocolate chips to a small bowl.
  11. Heat the heavy cream in the microwave until just about boiling.
  12. Pour the hot cream over the chocolate and let it sit for 1 minute. Then, stir ganache until smooth.
  13. Spoon about 1 teaspoon of ganache into each cooled cookie. Sprinkle sprinkles to the top if you want.
  14. Chill the cookies for 10 to 15 minutes so the ganache can set. I like to pop mine in the freezer for a few hours to ensure they’re hardened before storing.

Questions for you:

  • What’s next on your holiday baking list?
  • Are you team cinnamon/sugar/spice cookie OR team chocolate cookie?

Chocolate Brownie Sandwich Cookies

In case you didn’t notice, I’m very much in the midst of holiday baking. So far, we’ve made some graham cracker Heath bar toffee and Taylor Swift Chai cookies – with plenty more on the way!

These were next up. I asked each of my kids to share their top 3 holiday cookies, and one of FW’s favorites were these. Last year was the first year I had ever made them, and I wasn’t even planning on making them this year (like the Chai cookies!), but since they were top on his list, we made them again.

I need to first disclose a few things. First, this is not my recipe. One of B’s cousins made these cookies at his family’s annual golfing reunion, and FW gobbled them up there, so I asked for the recipe. Second, this uses a box of brownies! You can try to make them with your own homemade brownie, but I promise you, this recipe is not just easy, but it’s so tasty, and FW loves them this way. B’s cousin’s original recipe called for boxed frosting too – which you could definitely use! – but I think most boxes/cans of frosting have a funky aftertaste, so I opted to make my own and this is how the recipe has morphed into our own.

Here you go – here is the Chocolate Brownie Sandwich Cookie recipe. These are rich and very sweet, so if you’re eating them as part of a cookie tray, you may only want half of one so you have room to try some other cookies. Note that I typically double the recipe so that I have enough for us to enjoy, plus to give away with other holiday cookies.

Chocolate Brownie Sandwich cookies

Makes 1 dozen sandwiches (or as FW calls them, “chocolate hamburgers” — I don’t think that is very appetizing though)

Continue reading

Taylor Swift’s Chai Cookies – Updated!

Guess whose birthday is coming up this Saturday?

If you guessed my dad, you’d be right (Happy early birthday, Dad!). But if you guessed Taylor Swift, you’d also be right! Taylor Swift’s birthday is December 13, and in honor of her upcoming birthday – and the holidays, I decided to remake her famous Chai Cookie recipe.

I’ve made Donna Kelce’s chocolate chip cookies (here’s the recipe!), and last year I made Taylor’s Chai cookies (original version here). I enjoyed them, but it was a lot of steps and I never really got the icing to set completely. So this year, I decided to nix the cookie and it wouldn’t go on my holiday cookie plate. That is, until I asked FW to share what his favorite holiday cookies are — and he said these were in his top 3! (He also named chocolate sandwich cookies, which I’ll share the recipe soon – they’re so easy! – and raspberry thumbprints). So, the Taylor Swift Chai Cookies went back onto my list, with a few tweaks – mostly to the frosting.

Here you go – here is the updated Taylor Swift Chai Cookie Recipe. These are similar to a spiced snickerdoodle cookie with a buttercream eggnog frosting. And because of the butter, this frosting actually hardened and was great/easy to freeze!

Taylor Swift’s Chai Cookies (Updated)

(modified from Joy the Baker)

Makes about 2 dozen

Continue reading

Peach Yogurt Muffins

First, before you get any further – I should note that the title of this recipe may be confusing. These are not made with peach yogurt. Could they have been? Yes, but I made them with Greek yogurt and added peaches. Ok… now that that’s shared, I can get started with this recipe.

Here we are, back at school and back with another muffin recipe. This week as I was preparing snacks for the kids’ lunches, I made some mini banana muffins again, and, realizing I had a surplus of nectarines and peaches that were starting to go bad, I decided to make these peach muffins. Yes, we bake a lot of muffins, but they are such an easy snack inside or outside of school!

As usual, I’m not claiming these are the healthiest recipe. But they’re homemade, have white whole wheat flour and plain Greek yogurt, so I feel good about my kids having these every so often. And they’re easy to make, store and transport, so they really are a win for a back-to-school snack.

Peach Yogurt Muffins

Makes 12

Here’s what you need:

  • 2 cups white whole wheat flour
  • 2 tsp baking powder
  • ½ tsp baking soda
  • ⅛ tsp salt
  • ½ cup sugar
  • 1 cup Greek yogurt (plain or lightly flavored; lemon works wonderfully!)
  • ½ cup avocado oil
  • 2 eggs
  • 1 Tbsp vanilla
  • 1 Tbsp milk
  • 1½ to 2 cups fresh chopped peaches (nectarines are a great substitute)
  • Optional: cinnamon-sugar for topping

Here’s what you do:

  1. Preheat oven to 350°F. Prepare a 12-cup muffin tin by spraying with cooking spray or lining with baking cups. I like to use a silicone muffin tin.
  2. In a large bowl, mix together the flour, baking powder, baking soda, and salt.
  3. In a separate bowl, mix the Greek yogurt, avocado oil, eggs, vanilla and milk until smooth. Stir in the sugar.
  4. Add the wet mixture to the dry ingredients and stir until just combined — do not overmix.
  5. Fold in the chopped peaches, gently stirring until evenly distributed.
  6. Divide the batter evenly among the muffin cups. If desired, sprinkle the tops with cinnamon-sugar.
  7. Bake for 18–20 minutes, or until a toothpick inserted into the center comes out clean.
  8. Cool before enjoying.  

These store well in the fridge for about 5 days, but like most muffin recipes, I like to keep them in the freezer and take them out the night before enjoying them. I pack 1 in my kids’ backpacks, still frozen, the night before and they’re defrosted and ready-to-eat by their snack time the next day!

Some questions for you:

  • Do you like peaches or nectarines more? When I was younger, I preferred nectarines. Now I like them both and tend to buy more peaches!
  • What kind of yogurt do you buy?

Mini Banana Muffins

We’re back to school, here, which means it’s back to baking some snacks and treats for the kids to take with their lunches. If you’re new around here, here’s something you should know — we eat a lot of muffins, so I bake a lot of muffins. 

My oldest son now has snack OUTSIDE during the school day – it’s the same time as his recess – so he asked me to start packing him some smaller, bite-sized snacks. I’ve made energy bites (maybe that recipe will come soon), and the latest snack for him and his sister to bring — mini banana muffins. 

Now, I’m not claiming these are the healthiest recipe. But since they’re homemade, have some flaxseed and white whole wheat flour, I’d like to think they’re healthier than those pre-packaged muffins I’ve seen at the store. And they’re super easy and fast – in one hour (or less if you’re faster than me and not sidetracked with your ADHD) on a Sunday, you have snack for the week ready to go.

Mini Banana Muffins

Here’s what you need:

  • 3 medium, ripe bananas, mashed
  • 1/3 cup honey
  • 1/3 cup melted butter
  • 1 egg
  • 1 teaspoon pure vanilla extract
  • 1 cup white whole wheat flour
  • 2 TB ground flaxseed (optional, but adds some fiber
  • 1 teaspoon baking soda
  • 1/4 teaspoon salt
  • 1 teaspoon ground cinnamon or pumpkin spice mix
  • Optional: cinnamon-sugar for sprinkling on top

Here’s what you do:

  1. Preheat the oven to 350°F. Spray a 24-count mini muffin tin with cooking spray.
  2. In a small bowl, combine flour, flaxseed, baking soda, salt and cinnamon.  
  3. In a large bowl, melt the butter. Then add mashed banana, honey, egg and vanilla.  Combine well.
  4. Add dry ingredients into the large bowl with banana mixture. Stir with a spatula to combine, but don’t overmix.  
  5. Pour batter into prepared muffin tin.  
  6. Bake until a toothpick inserted into muffins comes out with a few crumbs (not wet mixture), about 11-12 minutes. 
  7. Cool before enjoying.  

These store well in the fridge for about 5 days, but I like to keep them in the freezer and take them out the night before enjoying them. I pack 2-3 for my kids’ snacks the night before in their backpack and they’re defrosted and ready-to-eat by their snack time the next day!

Some questions for you:

  • What kind of snacks do you or your kids enjoy?
  • What’s your favorite muffin flavor? Are you a corn muffin, banana or blueberry muffin lover?

Inside Out Chocolate Chip Cookies

FW and LM go to school early in the mornings, and on the days I work from home, GM and I have about 45 minutes to an hour to kill before he goes to preschool. On those days, sometimes we go for walks, sometimes I start working, sometimes we read together, and other days – we bake! With Teacher Appreciation Week coming, GM said he wanted to make some cookies for his teachers. I started showing him several pictures of different types of cookies, and when I showed him photos of chocolate cookies, he immediately said he wanted them. I decided to add white chocolate chips because I love white chocolate and they were a hit! Each of my kids liked them – and that doesn’t happen often. They’re brownie-like goodness with milk and white chocolate inside. Yum! Make them for you, your kids, your teachers – or just because.

chocolate cookies with white chocolate and milk chocolate chips

Inside Out Chocolate Chip Cookies

Here’s what you need:

  • 2 1/3 cups all-purpose flour
  • 3/4 cup unsweetened cocoa powder
  • 1 teaspoon baking soda
  • 1/2 teaspoon salt
  • 1 cup unsalted butter, softened to room temperature
  • 1 cup granulated sugar
  • 1 cup packed light brown sugar
  • 2 large eggs
  • 1 1/2 teaspoons pure vanilla extract
  • 1 cup white chocolate chips
  • 1 cup milk chocolate chips

Here’s what you do:

  1. Preheat the oven to 350°F and prepare a large baking sheet – I like to line with parchment paper.
  2. In a medium bowl, combine the flour, cocoa, baking soda and salt.
  3. In the bowl of a stand mixer, mix butter and sugars until smooth (about 2-3 minutes)
  4. Add eggs and vanilla to butter/sugar combination and mix until well combined.
  5. Gradually add the flour mixture to the stand mixer ingredients, about 1 cup at a time. Beat on low until just combined — do not overmix!
  6. Add in chocolate chips and stir with a spatula.
  7. Scoop up the dough with a tablespoon and place on the prepared baking sheet. At this point, I like to place a few more chocolate chips on the cookies so they look clean when they come out of the oven. Mine made about 3 dozen and I cooked 1 dozen a time on the baking sheet.
  8. Bake for 10 minutes; the cookies will be soft in the center. Cool on the baking sheet for about 3 minutes before removing to a cooling rack.
  9. Enjoy! They freeze well, too.

Some questions for you:

  • Are you a chocolate chip cookie lover?
  • Thoughts on white chocolate?

I Made Taylor Swift’s Chai Cookies

Note: I’ve updated this recipe! I found the frosting/icing to be too runny and never set — here’s an updated version if you prefer a harder frosting: https://icrashedtheweb.com/2025/12/09/taylor-swifts-chai-cookies-updated/. For the original recipe with the thinner icing, view below.

A few months ago, I made Donna Kelce’s chocolate chip cookies (here’s the recipe!), and after making them, realized I wanted to make a Taylor Swift recipe.

Not only is my 6-year-old daughter in love with Taylor Swift (as most 6-year-old girls seem to be these days), but Taylor Swift has a Cleveland connection – at least by her boyfriend, Travis Kelce. Travis Kelce is from Cleveland Heights, Ohio, and and we are often on “Taylor watch” when Kansas City is in town for football.

So this week was the PERFECT occasion to make the Taylor Swift cookies. Not only was Friday her birthday, but the Chiefs were in town playing the Browns! It was the perfect Taylor Swift weekend and my daughter and I celebrated by listening to Taylor Swift Christmas tunes and making her famous chai cookies.

I pretty much made this recipe exactly. I’ll admit that there were quite a few steps to make these with my daughter but they turned out great! They were like a spiced snickerdoodle cookie with eggnog frosting. YUM!

Would I make them again?

Maybe – they were good but there were a few extra steps and ingredients required that aren’t in my typical cookie recipe AND they require time to sit so they may not become my go-to cookie in a pinch. But they were good enough to share and my kids loved them! My oldest said they’re one of his top holiday cookies now.

Taylor Swift’s Chai Cookies

(originally shared from the Joy the Baker)

Continue reading

White Chocolate Pumpkin Pretzels

I love, love, LOVE white chocolate pretzels. My mom’s cousin (my Aunt Alice) used to make them growing up and it was a treat to get a tin of those during the holidays. Hers weren’t only delicious, but they looked great, too! She made chocolate-covered pretzels also, and while I love those, the white chocolate are my absolute favorite.

So when I found myself in Michaels with my daughter a few weeks ago and I sporadically picked up some orange candy melts, I knew I had to make some festive Halloween pretzels. This turned into a fun kid-friendly activity that I enjoyed with LM! Since she broke her arm, we’ve found ourselves with a few free evenings that we would have usually been at soccer practice, cross-country, or another activity – so on of those evenings, we opted for this activity! They didn’t turn out as professional-looking as I would’ve liked, but when a 6-year-old and I bake, it’s mostly about having fun (and enjoying the fruits of our labor). 

white chocolate pumpkin pretzelswhite chocolate pumpkin pretzels

White Chocolate Pumpkin Pretzels

Here’s what you need

Here’s what you do:

  1. Line a baking sheet with foil and set aside.
  2. Melt chocolate according to directions. I placed mine in a glass Pyrex and melted it in the microwave on 50% power for 1 minute, then stirred it and melted it again for another 1-2 minutes and stirred again. Do not overheat or the chocolate may seize.  
  3. When chocolate is melted, dip each pretzel into the chocolate, tapping the edge of the bowl to release the extra chocolate.
  4. When pretzel is fully covered, lay it down on the foil and then place an M&M at the top of the pretzel so that it looks like the stem of a pumpkin. Repeat until you run out of chocolate.  Mine made about 30 pretzels, but we ate a few along the way 🙂
  5. Let cool/dry completely. I put mine in the fridge to speed up the process.

Screenshot 2024-10-07 160816

Some questions for you:

  • Do you like chocolate covered pretzels?
  • What would you have made with a surplus of orange melting chocolate?

Apple Crumb Muffins

We eat a lot of muffins in our house. They make the perfect snack for my kids to bring to school, and they’re easily portable enough to bring to sporting events. We recently went apple picking, so I was looking for a way to use up some of our apples — and boom! These apple muffins were the perfect solution. They’re like my banana crumb muffins, but made a little healthier with white whole wheat flour, honey, and a flax egg for some added fiber.

And a bonus – all three of my kids like them! That hardly ever happens. Hopefully you (and your kiddos) will enjoy them too.

apple crumb 2

Apple Crumb Muffins

Here’s what you need:

For the muffins

  • 2 cups white whole wheat flour  
  • 1 1/2 teaspoon baking soda
  • 1 teaspoon baking powder
  • 1/2 teaspoon salt
  • 3 teaspoons pumpkin pie spice
  • 2 TBS flaxseed for flax eggs* (see below for direction on how to make them)  
  • 2/3 cup honey
  • 1/2 cup avocado oil
  • 2 teaspoon vanilla extract
  • 1/2 cup plain Greek yogurt or buttermilk 
  • 2 cup diced or grated apple – I used about 2 1/2 apples

For the topping:

  • 2/3 cup white whole wheat flour  
  • 3/4 cup brown sugar 
  • 4 Tablespoons unsalted butter, melted
  • 1 Tablespoons cinnamon
  • 1/8 teaspoon salt

Here’s what you do:

  1. Preheat the oven to 350 degrees F. Prepare a muffin tin for baking. I use silicone reusable baking cups and spray them with non-stick cooking spray.  
  2. Mix the topping ingredients in a small bowl until well combined. 
  3. Preheat the oven to 350°F / 175°C. Line a muffin tin with muffin liners. My recipe typically makes 19-22 muffins depending on how full the muffin cups are.
  4. In a medium bowl, whisk together the dry ingredients (flour through salt).
  5. In another bowl, mix the wet ingredients (flax egg* through yogurt).
  6. Add the flour mix to the wet mix. It just needs to be combined, so be careful not to overmix.
  7. Fold in the apples. 
  8. Pour muffins into prepared muffin tins.
  9. Evenly pour topping onto each muffin – you’ll have about a Tablespoon of topping for each muffin and it should cover most of the muffin.  
  10. Bake for about 15 – 17 minutes or until a toothpick comes out clean. 
  11. Enjoy when cool! We have eaten these the same day, but they are truly great the next day. They’re also great frozen!  I simply take one out of the freezer and defrost overnight OR in the microwave. 

Got a surplus of bananas instead? Give these a try instead!

Here’s how to make your flax eggs: Mix 2 TB flaxseed with 5 TB water in a small bowl. Put in the fridge for around 5 minutes (or up to 5 days) until it’s mixed together/practically congealed.

Some questions for you:

  • When was the last time you went apple picking?
  • What’s your go-to apple recipe?

Football-Shaped Chocolate Peanut Butter Balls (Buckeyes)

Fun fact – back in my PR agency days, we had to come up with creative ways to say “Super Bowl.” We could never use the terminology Super Bowl when promoting any specials/promotions/deals, etc. Because of the NFL’s strict trademark rules, we had to say things like, “The Big Game” or “Sunday’s Game” or “Game Night,” etc.  So if you’re ever watching a TV ad or seeing a company tweet about their “Game Day Special” that’s why they’re not saying Super Bowl or even a team name.

Anyway, I digress. But as you’re getting ready for the Big Game – and looking for a treat to make to bring with you, here’s a fun idea!

I love buckeyes. I love anything peanut butter and chocolate. So if you’re wondering what I’m making to bring to this weekend’s festivities, in addition to Donna Kelce’s chocolate chip cookies, I’ll be sharing these delicious treats – football-shaped buckeyes!

If you’re not from the Midwest, haven’t ever lived in the Midwest, or not a big candy person, you may not know what a buckeye is — here’s a full buckeye recipe and explanation.  This recipe expands upon that to make something football themed. It’s tasty and fun to make!
buckeye footballs

Football-Shaped Chocolate Peanut Butter Balls (Buckeyes)

Here’s what you need:

For the peanut butter filling:

  • 1 1/2 cups creamy peanut butter
  • 1/2 cup butter, softened
  • 1 Tablespoon vanilla extract
  • 3 1/2 cups sifted confectioners’ sugar

For the outer layer”

  • 1 12-oz package of semisweet chocolate chips
  • 1 Tablespoon of Crisco or shortening
  • White frosting or icing– I used about 1/3-1/2 tube of Betty Crocker white decorating tube icing – you can also make your own white icing, but I went the easy way and this was perfect with the #5 decorating tip

Here’s what you do:

    1. Line a baking sheet with foil or waxed paper.
    2. In a medium bowl, mix peanut butter, butter, vanilla, and confectioners’ sugar. Mix well (I use my KitchenAid) until it forms a stiff dough.
    3. Shape dough into balls, and then pinch the sides to make the ball into a football shape.
    4. Place each peanut butter football on the pan and then chill in the refrigerator for at least one hour or freezer for 30 minutes.
    5. When firm, it’s time to make the chocolate coating! Melt shortening and chocolate together in a microwave-safe bowl. I recommend checking the chocolate every 30 minutes and stirring. It’s done when the chocolate looks *almost* all melted – you should then remove from microwave and be able to stir until smooth.
    6. Remove the peanut butter footballs from freezer. Dip each football into the melted chocolate until fully covered. I placed mine on a small fork but they also sell chocolate dippers. Return the chocolate-covered football to the wax paper/foil and repeat until all are covered.
    7. When chocolate is set, you can add the laces. Using your white icing, draw the laces onto the footballs.
    8. Refrigerate for 30 min to one hour to set completely. Enjoy!

I want to know – have you heard of a Buckeye as a dessert before?

Do you love peanut butter and chocolate like I do?

Any other football-themed desserts you enjoy?